
I know there are a lot of people out there that aren’t ready to let go of summer. I however, am not one of those people. I LOVE fall and I have been looking forward to it for at least a month. The 90+ degree-days have gotten old and I am beyond ready to break out my plaid and sweaters. I love it when the leaves start changing color and the days get cooler. It is definitely time to break out all the candles with pumpkin and cinnamon. Most of all, I am looking forward to making peppermint fudge (and then eating the whole pan by myself). So, while it may seem like I’m jumping the gun with showing you our various Halloween blankets, I actually think I’ve done a pretty good job of waiting. The benefit of showing these off now though is that you will still have time to make yourself a blanket before Halloween if you so desire.
My mom always liked decorating for holidays and Halloween was second only to Christmas for the number of boxes of decorations stored in the attic. She definitely passed the love of holiday decorating on to Kira and me. We both have quite the collection of holiday décor; although I’m pretty sure Kira is winning. This love of Halloween has led us to design a number of blankets specifically for this holiday. We have a few kits left of each one and we wanted to feature them and give the rest of the world the chance to catch up to us in sheer quantity of decorations.
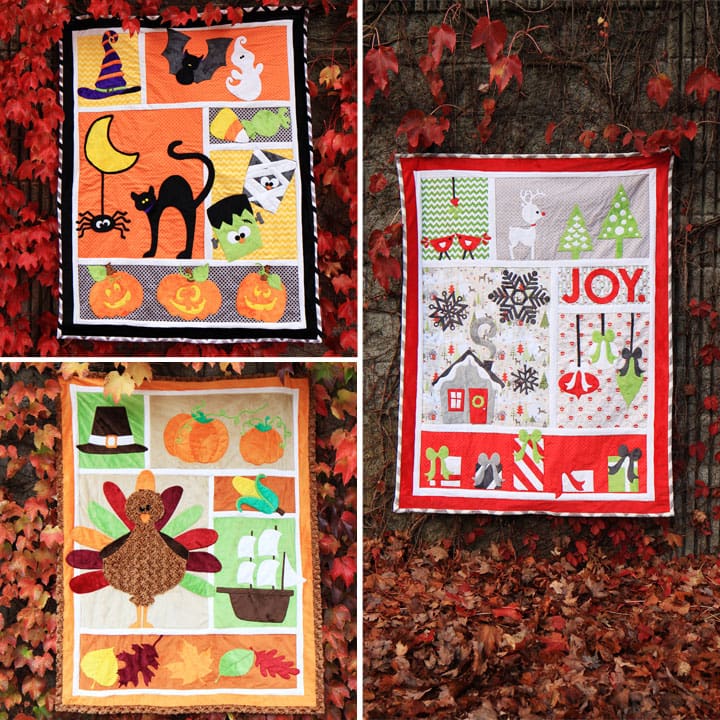
Our first Halloween blanket was designed all the way back in 2013 and it is called Tricks and Treats. Kira designed this one, and it was part of the Holiday Festival three-pack. The three-pack included this Halloween quilt, a Thanksgiving quilt and a Christmas quilt.
 This pattern, and four others, were the first released as what we call “template packs”. Template packs are simply the tracing guides for our applique designs; they do not include directions for any sort of blanket.
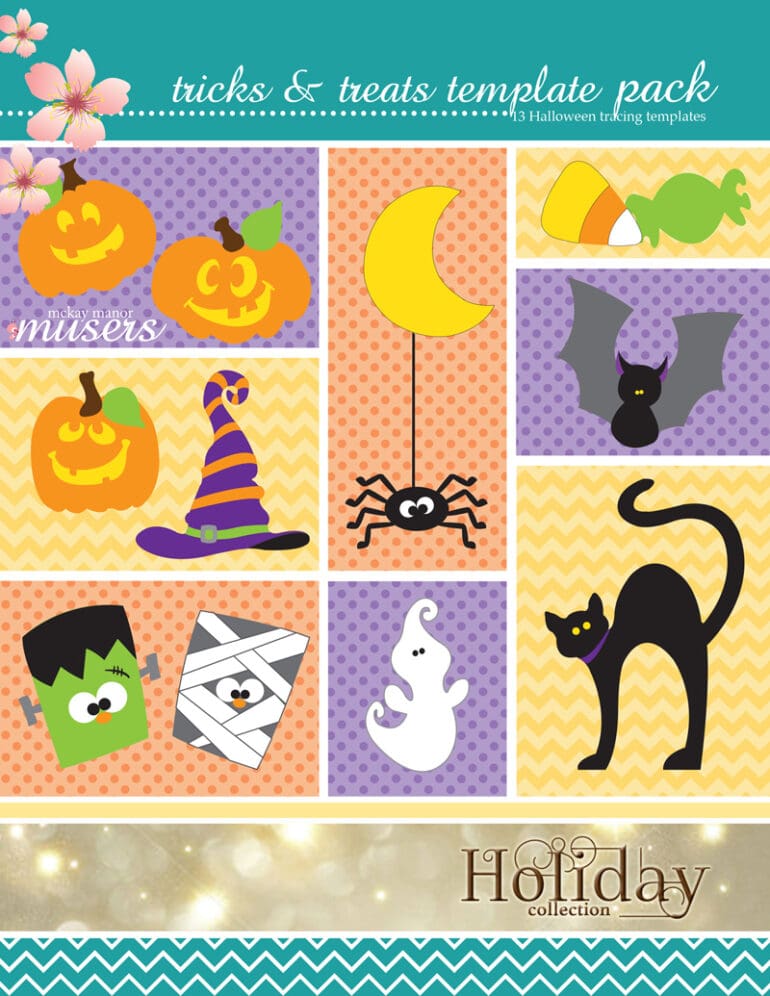
Tricks and Treats template pack front cover
If you want to make the blanket, you have to purchase the coordinating blanket pattern (for this one it is basic block blanket: style 1).

Basic block blanket: style 1 front cover
The reason we chose to structure the patterns this way was to allow our customers to save money. Normally we would release each pattern as a $9.00 blanket pattern. However, the only difference between the blankets is the appliques. By separating the blanket from the applique tracing guides, our customers can pay for the blanket portion of the pattern for $3.00 then buy the appliques they want at $6.00 each. For those of you not doing the math, the pattern cost to make that first blanket is $9.00. However, the cost for each additional blanket pattern is only $6.00 (instead of another $9.00) because you only need to buy the applique tracing guide portion for the next blanket. Or, if you really just like our applique designs, then you can simply buy the tracing guides and put them on whatever project you want. See how nice we are? *wink, wink*
![]() Tricks and treats was wildly popular when we released it and we had to restock the kits numerous times over the years. It’s the perfect lap sized blanket for the couch at 43” x 56” (3 feet 7 inches by 4 feet 8 inches). We still have a couple from our last restock if you want to make one for you or someone you know who loves Halloween.
Tricks and treats was wildly popular when we released it and we had to restock the kits numerous times over the years. It’s the perfect lap sized blanket for the couch at 43” x 56” (3 feet 7 inches by 4 feet 8 inches). We still have a couple from our last restock if you want to make one for you or someone you know who loves Halloween.
I know I get easily discouraged if my projects take too long to complete which is why we try to make all of our patterns as easy as possible. Are you scared of applique, or cuddle fabrics, maybe both? With this pattern, you don’t need to be! Doing applique with cuddle fabrics is the best! They make a huge mess the first time you cut them, but they will never fray, which means you can leave all of you appliques with a raw edge. We like to hold the appliques in place with a fusible web (like Steam a Seam lite 2® or wonder under) instead of pins for sewing, then secure them permanently with a straight stitch about 1/8” in from the raw edge. The blanket is ‘quilt as you go’, so you don’t build the whole quilt top and then add the appliques. Instead, you add the applique to each ‘block’ first, and then join the blocks to create your quilt top. Each block has a matching piece of batting behind it, and adding your applique acts as your ‘quilting’ so you don’t need to do any additional quilting to your individual blocks, or once you join your blocks together. Of course, you certainly can if you want to. We’re not going to come to your house and stop you. In fact, we encourage you to get creative and make it your own! Technically though, once you join the blocks of your quilt top, you are done with the applique and quilting if you want to be. That means you just need to add a backing using your preferred method and you have a new blanket to snuggle up with!
Our second Halloween blanket was released two years later, and it is called Positively Bootiful.
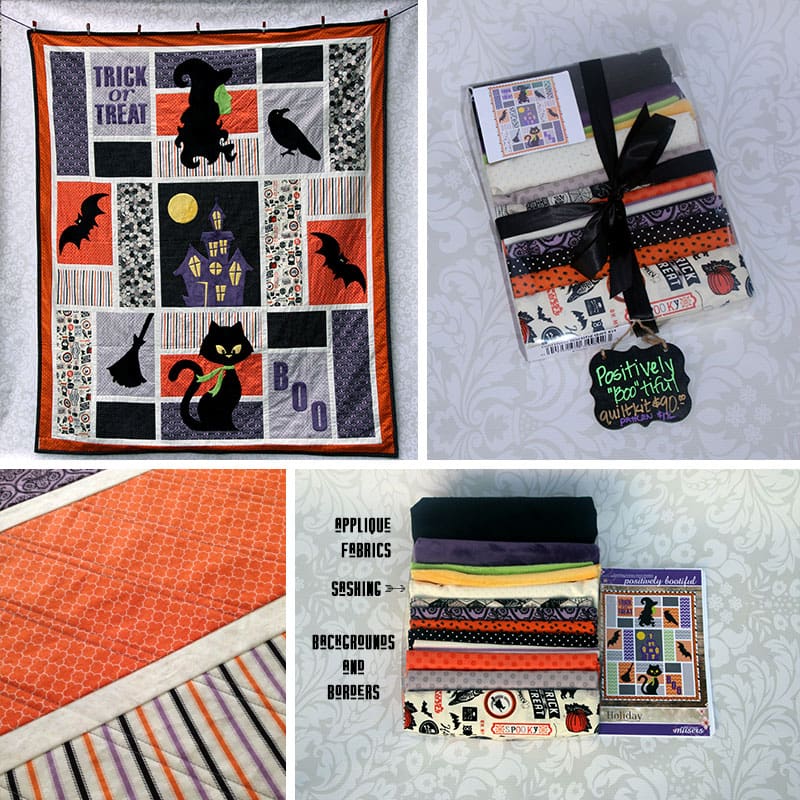 When I first went to college I was given a ridiculously soft, queen-sized blanket that quickly became my preferred couch blanket. Since I’m pretty tall, and I had become accustomed to a large couch blanket, I decided I needed to design a bigger Halloween quilt. I knew it had to have a cat, but I also wanted the appliques to be simple and a bit less cute. I don’t do creepy, and clearly these are still pretty cute, but… it was a step in the right direction. This is still a quilt as you go blanket, and although each background block is a bit more involved this blanket still goes together fairly quickly. In the collage above, that picture in the lower left corner is showing my ‘additional quilting.’ I like to add my quilting before adding my appliques, since I typically do straight-line quilting using painters tape as my guide and it’s easier if you don’t have to go around the appliques. The finished size for this one is 60” x 72” (5 feet by 6 feet) and because we used super soft cuddle fabric as the backing, my husband and I usually fight over who gets this blanket each night.
Our most recent release is the Halloween Lattice blanket.
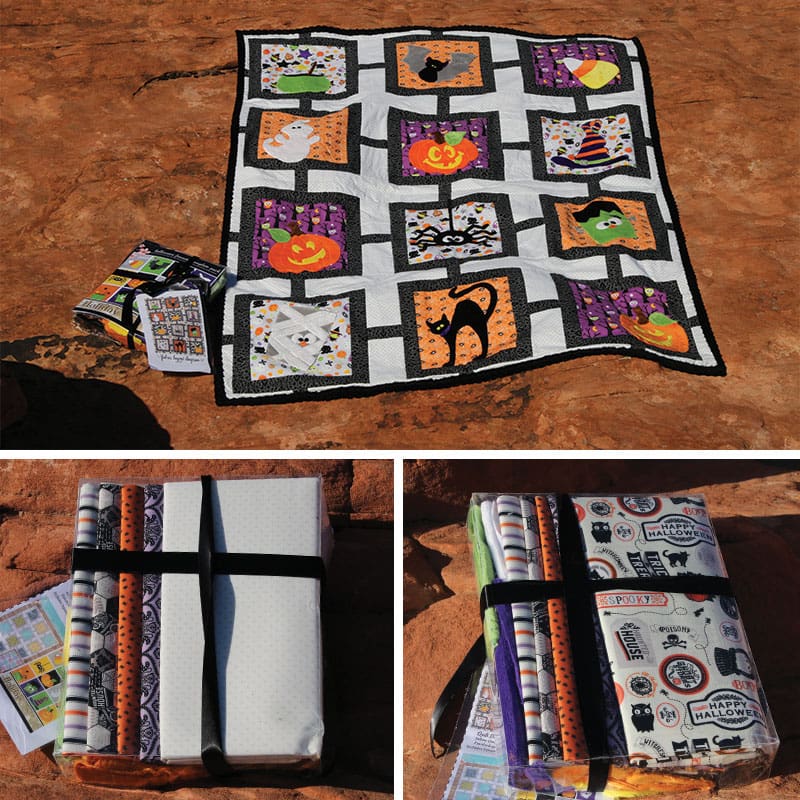 As you may have noticed, the appliques are the same as the Tricks and Treats blanket. When we designed block blankets 1 and 2, the background blocks were fairly large. As a result, the appliques were equally large so they would adequately fill the space. While it made for a super cute blanket, the appliques were a bit difficult to use in other applications. The Halloween Favorites Template Pack was born when Kira had the idea to resize the appliques to fit on one of her newer quilt patterns (the square lattice quilt). She made a sample to show what you could do when you put the two patterns together, and people asked for kits. Since we like to make our customers happy, we obliged. We still have a few left though, so you can still snag one for yourself. The finished size on this one is somewhere between the other two at 45” x 60” (3 feet 9 inches by 5 feet).
Whew! That was a long post. I hope you made it to the end because this is where I tell you that all you can take $10.00 off any Halloween kit from now until October 31st, 2017 just by entering the code HALLOWEENKIT10 at checkout.


0 Comments